

How to Varnish a Painting
- Painted Lady Art Supplies
- Jan 14, 2024
- 10 min read
Updated: Dec 27, 2024
You've completed your latest masterpiece, and now you want to know how best to protect it from sun, dust, and greasy fingers. Please consider properly protecting your work, especially if you plan to sell it.

Why Varnish?
I often hear artists say that they don't bother varnishing their work. As a framer, I also see firsthand the dirty condition artwork is in after sitting in a buyer's house for five, ten, thirty plus years. As an artist, we must expect that it will need to be cleaned at several points during the work's lifetime. It's our responsibility to provide artwork that has a stable and preferably water-resistant surface.
As well as protecting your artwork from physical dust and grime, varnish also helps to shield your artwork from UV rays. All light has damaging UV rays, and even in a dim room your art may fade over time. Using high quality paints that are lightfast will significantly help, but you should also consider protecting them with an archival UV protective varnish. Different types and brands will offer different levels of UV blocking, so it's important to do your research. We've all seen artwork or collectibles with the signature faded away because the pen they used to sign it wasn't lightfast. Don't be that person.

Another reason for varnishing is that most paints have varying surface finishes. Artist oils and acrylics range in gloss level depending on the colour. For example, earth tones are usually very matte, while vibrant transparent colours can be glossy. Unless you are very meticulous about adding the same amount of painting medium to each part of your painting, your finished piece will likely have glossy and dull areas. This is especially true with oil paints, which dull as the oil cures. Traditionally you would varnish an oil painting with gloss to return the colours and values to their intended look, though nowadays you also have the choice to varnish them satin or matte.
Any artwork that is too fragile to wipe with a damp cloth, should be displayed under glass. Even under ideal circumstances, they will still get dusty over time. Extra care should be taken with mixed media paintings that use water-soluble mediums, alcohol ink, pastel, etc.
*For example, if you use Posca paint pens, they should be spray varnished to seal them. They can run if you wipe them with a damp cloth or if you try to varnish them with a brush-on varnish.
Most people are not willing to take their painting to a conservator to have them professionally cleaned, and instead opt to do it themselves. You should expect that paintings will be wiped down, likely with a damp cloth.
Choosing a Compatible Varnish
There are hundreds of different styles and brands of varnish, so picking the correct one can be daunting. Just like painting mediums, everyone has their favourite which works best for them. I have tested MANY brands and types over the years, so here I will list what I found works best for me. When deciding on your varnish, the most important thing is to consider the medium of your artwork. Not all varnishes are compatible with all painting mediums.

There are two main types of varnish: "Archival" varnish, and craft-grade acrylic varnishes which are not archival. When something is referred to as archival, it means that it is meant to preserve and protect your work for an enduring period of time. In the art world, archival and acid-free are terms you should look for if you are interested in keeping your work looking good for decades. If you want your artwork to maintain value and be collected, you should definitely plan to protect it for years to come. Paper, tapes, glues, varnishes, etc which are not acid-free will yellow over time and cause irreparable damage to the artwork.

Natural varnishes such as Dammar will also yellow over time, so I would avoid them unless you are trying to follow a specific traditional technique. In the past, this meant that varnish had to be removed and reapplied over the lifetime of the painting. Most modern varnishes are synthetic and are made to resist yellowing, though they should still be removable for conservation purposes, in case the varnish fails or is damaged in some way. Archival varnishes are always removable.

Craft grade and less expensive acrylic varnishes are usually not removable and don't list any UV blocking capabilities. They will still protect the artwork from dust and dirt, and even-out the finish, so if you are on a tight budget they may work for you. I recommend spending a little more for the UV protection if you can. People often choose to hang artwork in sunny locations, so it's not worth risking it in my opinion.
*Resin also falls into the craft category, even though it looks nice at first. It can be prone to yellowing or cracking, and is not removable, so it is not considered to be archival.
Acrylic Paintings:
The vast majority of you will be trying to decide whether or not to varnish your acrylic paintings. Most paint brands recommend that you DO varnish your acrylic paintings. Golden paints have done extensive research on varnishing acrylics, and if you want to deep-dive, please spend some time on their website here >>

The most reliable brush-applied polymer varnish for acrylic paintings we found was Winsor and Newton professional varnish. It doesn't require dilution, which simplifies the process. It is available in Gloss, Satin, and Matte finishes.
Our second choice is Gamblin Gamvar Varnish, which works for oils and acrylics.
The easiest spray-on varnish for acrylics and oil paintings was Krylon Archival Spray and Winsor and Newton Professional spray varnish.
An "Isolation Coat" of acrylic medium is recommended when varnishing acrylic paintings. This is a thin, clear layer of acrylic medium which will act as a barrier between your painting and a removable varnish. It also seals in any absorbent areas in your paint film. Uneven varnish application is usually due to parts of your painting being more absorbent than others, so the varnish is sinking in instead of sitting on top. This is also what usually causes cloudy areas when using matte or satin varnishes. Golden recommends water-diluted soft gel gloss or their pre-made "Isolation Coat." Learn more about Isolation Coats on Golden's website >>
Oil Paintings:
Not all varnishes can be applied over oil paintings. Always check the label to make sure a varnish is compatible with oil paints, or you may run into trouble with adhesion or cracking.
Look for Mineral Spirit Acrylic or varnishes specifically made for oil paintings.
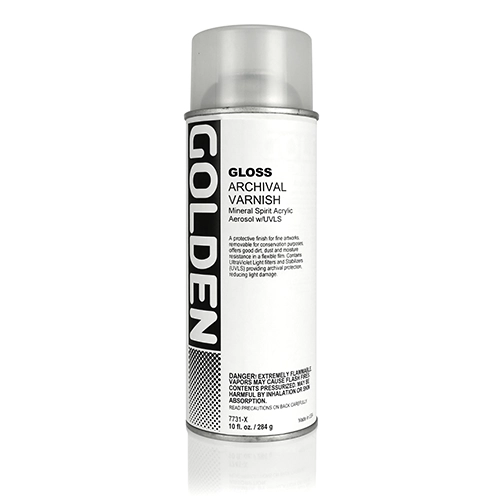
The easiest to use and apply with a brush is definitely Gamblin Gamvar, which has no smell and cleans up with soap and water. The easiest spray-on varnish is Krylon Archival Spray or W&N Professional Varnish, followed by Liquitex Soluvar spray. Lastly I would choose Golden Archival MSA, which offers great protection, but has a strong odour, difficult to open cap, and the most visible spots on the surface of smooth paintings.


Watercolour:
Usually I would recommend putting watercolour and gouache paintings under UV protective glass to protect them. If you want to display watercolours without glass though, I would definitely apply a varnish. The best way to display watercolour paintings without glass is by painting on an Ampersand Aquabord, Strathmore Artist Panel, or using Watercolour Ground on a panel (it's like gesso made for watercolours).
I personally choose to use a spray varnish on watercolours, to reduce the chance of the colours lifting with brush application. You want to use MSA varnishes, because water-based ones may cause the colours to run. For watercolour it is usually recommended to use a matte finish to maintain the paper-like appearance. Krylon Archival Matte spray, Winsor and Newton Professional Matte, or Golden Archival MSA Matte spray work well.
Alternatively, if you want a rub-on varnish, you can use a cold wax such as Gamblin Cold Wax or Dorland's Wax Medium. Please note that there is conflicting information about whether it's toxic to apply. Wear gloves and dispose of any rags immediately, as it contains solvent. They claim that it is non-yellowing, though I would use caution as they are made with natural dammar resin(which can yellow over time).
Spectrafix is another brand which makes a casein and bees wax spray, suitable for watercolour and gouache. The spray bottle style can leave speckles, so we recommend the non-aerosol sprayer.
Pencil Charcoal and Pastels:
Spray Fixative is recommended for most dry media, as they do not set. Fixatives have received a lot of flack from artists however because they can alter the look in some cases. The most common complaint is that it changes the look of highlights. I recommend testing thoroughly before using them on your finished work.
Tips for Success:
Shake can thoroughly and make sure it isn't too cold
Stand the work up right, so that larger globs fall and don't land on the paper
Hold can about a foot away from the artwork
Start the sprayer off the side and glide over the artwork(protect for overspray)
Use a light hand, in several very thin layers
If you find it changes the highlights, apply when you are almost finished, then touch up any final details after fixing
There are two types of fixative: Workable (you can use it part way through your process and keep on working on top) and Final (usually a sealer with UV protection). I've had good results with Krylon Workable Fixatif and Winsor and Newton Professional Fixative. You can use fixative on pencil, soft pastel, watercolour, charcoal, etc. Some artists use it to set charcoal or pencil before painting over it, so it doesn't smudge. They also make a special fixative for oil pastels (which never cure, so you will need to seal them if you display them without glass).


Spray Varnish or Brush On?
Once you decide on what type of varnish you need for your specific medium, you can then decide on how you want to apply it. Most types come in both spray or brush-on versions. Each have their pros and cons, so I will discuss them below.
Brush On
Brush-on application is great because it can be done indoors, so you aren't limited by the temperature and weather outside. If the varnish has fumes, you will still need good ventilation and/or a respirator. Liquid varnishes are thicker in application and take longer to dry. Brush-on varnish also requires more supplies and a dedicated work-space to get a good result.

You will need:
Good quality varnish brush(preferably synthetic)
Disposable cup or glass jar
Stir stick
Drop cloth/cover for your table
Brush Soap or Paint thinner(depending on your product, always read label instructions)
Gloves
Paper towel or rags
Respirator if fumes are a concern
Thinner/distilled water if product is concentrated
*Some people like to use foam applicators for varnish, but I have always found they cause foaming or bubbles. It's great to test different methods and see what works best for you.
My favourite brush on varnish that works with oil or acrylic paintings is Gamvar by Gamblin. I like it because it's so easy to use. There is no smell or fumes, and it cleans up with soap and water. Read more about it on their website here >>
It comes in Gloss, Satin, and Matte finishes.
They recommend doing one thin layer, so a small amount goes a long way.
Gamvar Varnish brushes are my favourite varnish brush, due to how dense and yet soft the synthetic bristles are. If you clean it properly, it will last you for years.
Gamvar varnish can be used on oils as soon as the paint film is firm. The oils continue to cure through the surface, so it isn't necessary to wait the full cure time. This makes it the most popular for those working on oil painting commissions, for example.
If you want a thick, protective coating on your artwork then Golden MSA brush-on varnish is for you. This varnish is rated to go outside, and offers the best in UV protection. It does have a lot of fumes, and the formula is concentrated so you also need the Mineral Spirit Acrylic Solvent to thin it to your desired consistency. Regular paint thinner or odourless mineral spirits are not strong enough to dissolve it properly.
I found this varnish to be the most difficult to apply consistently, but with practice you can get great results.
This varnish works on both oils and acrylics, though you will need to wait until an oil painting is fully cured.
How to Clean your Varnish Brush
Wipe as much as you can off onto paper towel or a lint-free rag
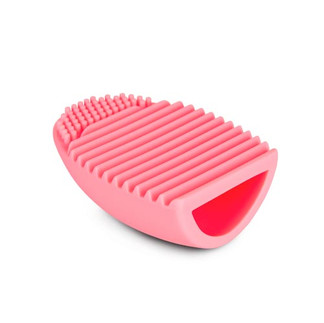
Wash with brush soap and warm water. Swirl it in the soap and use your gloved hand or a silicone brush washer to remove as much of the varnish as possible
I find that there is always a bit of residue left no matter how diligent, so I then soak it overnight in Winsor and Newton Brush Cleaner and Restorer. Put it in a metal or glass container, and only fill it about halfway up the bristles ( it will dissolve the glue in your brush and take the paint off the handle if it sits in it directly)
Rinse with warm water the next day and lay flat to dry (standing your brushes upright causes water to sink into the ferrule and swell the wood or crack the paint).


Spray Varnish
Spray varnish is great because you require less supplies, you can do it outside, it dries super fast, and it's easiest to have invisible coverage. Several very light layers will look almost invisible, but will still provide great protection as long as they are applied correctly.
You will need:
sheet or cardboard to protect surroundings from over-spray
A well-ventilated area outside or in a garage
Respirator if fumes are a concern
The spray-on varnishes that work best in my experience are Krylon Archival, Winsor and Newton Professional Varnish, Liquitex Soluvar Spray, and Golden Archival Varnish. Each of these can be used for acrylic, oil, or watercolour paints. For oil paintings, they must be fully cured for 3-6 months(depending on the thickness of your paint) before using a spray varnish.
The most invisible coverage were the Krylon Archival and W&N Professional. The Liquitex Soluvar and Golden Archival have a thicker appearance. I especially noticed more spray texture with the Golden, though this was on a very smooth painting.
How to Spray Varnish
Work outside or in a well-ventilated area with a respirator
Make sure the can isn't too cold before you begin
Cover the backdrop and ground around the painting with cardboard or other material, protecting at least a foot or two around the painting from overspray
Shake the can for a full two minutes, especially matte or satin so that the matting agents thoroughly mix into the varnish.
Stand your work vertically against a wall or support. This allows larger, heavier globs to fall and not land on the picture when you spray it.
Always test the sprayer, pointing it away from your picture and make sure the flow is even and consistent.
Always start the spray off the side of your picture - glide over the picture - and end the spray off the other side of the picture. Never start the sprayer directly on your image (you risk uneven spray marks as you start and end the pressure).
Work from side to side, overlapping slightly, one thin layer at a time.
Don't forget to do the sides of canvases and panels as they are the most handled areas.
Let each layer dry for 10-15 minutes.
Turn painting 90 degrees and repeat the process.
Do this 5-6 times for a thin layer, more if you want a thicker coating.
If working with matte, too many layers may make the image cloudy, so it may help to do the first few layers in gloss or satin and finish in matte. 4-5 layers of matte have never been a problem for me personally
Always test a new product on a piece you aren't super invested in.


Comments